


Drawing your own blood at home might sound intimidating, but the process is surprisingly manageable with the right approach. Most people assume you need a professional to handle blood sampling, yet thousands of accurate results come from self-collected samples every month. The real secret is not advanced medical training, but preparation that anyone can do in their kitchen.
Table of Contents
- Step 1: Gather Necessary Equipment and Supplies
- Step 2: Prepare Your Work Area for Cleanliness
- Step 3: Follow Proper Techniques for Blood Collection
- Step 4: Label and Store Your Samples Correctly
- Step 5: Send Your Samples for Testing Safely
Quick Summary
| Key Point | Explanation |
|---|---|
| 1. Gather high-quality equipment | Use sterile lancets, alcohol swabs, and gloves to ensure accurate results and personal hygiene during blood sampling. |
| 2. Maintain a clean workspace | Sanitize your area to prevent contamination and organize equipment for easy accessibility during the sampling process. |
| 3. Follow proper blood collection techniques | Wash hands, select the right finger, and avoid squeezing to collect an undiluted blood sample effectively. |
| 4. Label samples clearly and correctly | Ensure your samples are accurately labelled with personal information to avoid mix-ups and errors in analysis. |
| 5. Package and send samples securely | Use leak-proof containers and follow transport guidelines to maintain sample integrity and ensure prompt delivery to the lab. |
Step 1: Gather Necessary Equipment and Supplies
Starting your at-home blood sampling journey requires careful preparation and the right tools. Successful blood sampling depends on having a comprehensive set of high-quality equipment that ensures both accurate results and personal comfort. Before beginning, you will need to assemble a collection of precise medical supplies that will support a smooth and professional sampling process.
The primary components for an effective at-home blood sampling kit include sterile lancets, alcohol swabs, gauze or cotton pads, adhesive bandages, disposable gloves, and a blood collection tube or card. Each item plays a critical role in maintaining sample integrity and personal hygiene. Professional-grade lancets with adjustable depth settings can help minimise discomfort and ensure consistent blood droplet sizes, which is crucial for accurate testing.
Ergonomic design matters significantly when selecting your sampling equipment. Look for lancets with ergonomic triggers that reduce hand strain and provide controlled puncture depth. Disposable gloves should fit comfortably and be made from latex-free materials to prevent potential allergic reactions. Alcohol swabs need to be individually packaged and contain at least 70% isopropyl alcohol to effectively sterilise the puncture site and reduce infection risks.
Learn more about professional blood sampling preparation before you begin. Having a clear, organised workspace with good lighting and a stable surface will further enhance your sampling experience. Place all your materials within easy reach, ensuring you can complete the process smoothly and confidently.
Before starting, double-check that all your equipment is:
- Sterile and unopened
- Within its expiration date
- Appropriate for your specific blood test requirements
By meticulously gathering and preparing your equipment, you set the foundation for a successful at-home blood sampling experience that delivers precise, reliable results.
Below is an organised overview of the main equipment and supplies required for effective at-home blood sampling, including each item’s purpose and any important specifications mentioned in the article.
| Equipment/Supply | Purpose | Specifications/Notes |
|---|---|---|
| Sterile lancets | To obtain a blood sample via fingertip puncture | Professional-grade, adjustable depth, ergonomic |
| Alcohol swabs | To sterilise the puncture site | Individually packaged, 70% isopropyl alcohol |
| Gauze/cotton pads | To help stop bleeding and clean the area | Disposable and sterile |
| Adhesive bandages | To protect the fingertip after sampling | Sterile |
| Disposable gloves | To maintain hygiene and prevent contamination | Latex-free, well-fitting |
| Blood collection tube/card | To collect and store the blood sample | As required by specific test |
Step 2: Prepare Your Work Area for Cleanliness
Cleanliness is paramount when preparing for at-home blood sampling. Your workspace must be meticulously organized and sanitized to prevent potential contamination and ensure accurate test results. A clean environment is not just about appearance, but about creating a sterile condition that protects both your sample and your personal health.
Begin by selecting a flat, stable surface such as a clean kitchen table or a dedicated workspace with good lighting. Clear the area completely of any unnecessary items, food, drinks, or potential sources of contamination. Wipe down the entire surface using a medical-grade disinfectant or 70% isopropyl alcohol solution, allowing the surface to air dry completely. This step eliminates bacteria and ensures a pristine sampling environment.
Prepare a dedicated area with all your previously gathered equipment within easy reach. Arrange your materials in a logical sequence: sterile lancets on one side, collection tubes or cards in the centre, and disposal containers nearby. Learn more about professional blood sampling preparation to understand optimal workspace organization. Consider laying down a clean, disposable paper towel or medical pad to create an additional barrier between your equipment and the work surface, further reducing contamination risks.
Your final workspace verification checklist should include:
- Surface completely clear of non-essential items
- Area wiped down with medical-grade disinfectant
- Good natural or artificial lighting
- All sampling equipment organized and within reach
- Disposal container positioned conveniently
By dedicating time to creating a clean, organized workspace, you significantly enhance the reliability of your at-home blood sampling process.
 Attention to these critical preparation details ensures that your sample remains uncompromised from collection through analysis.
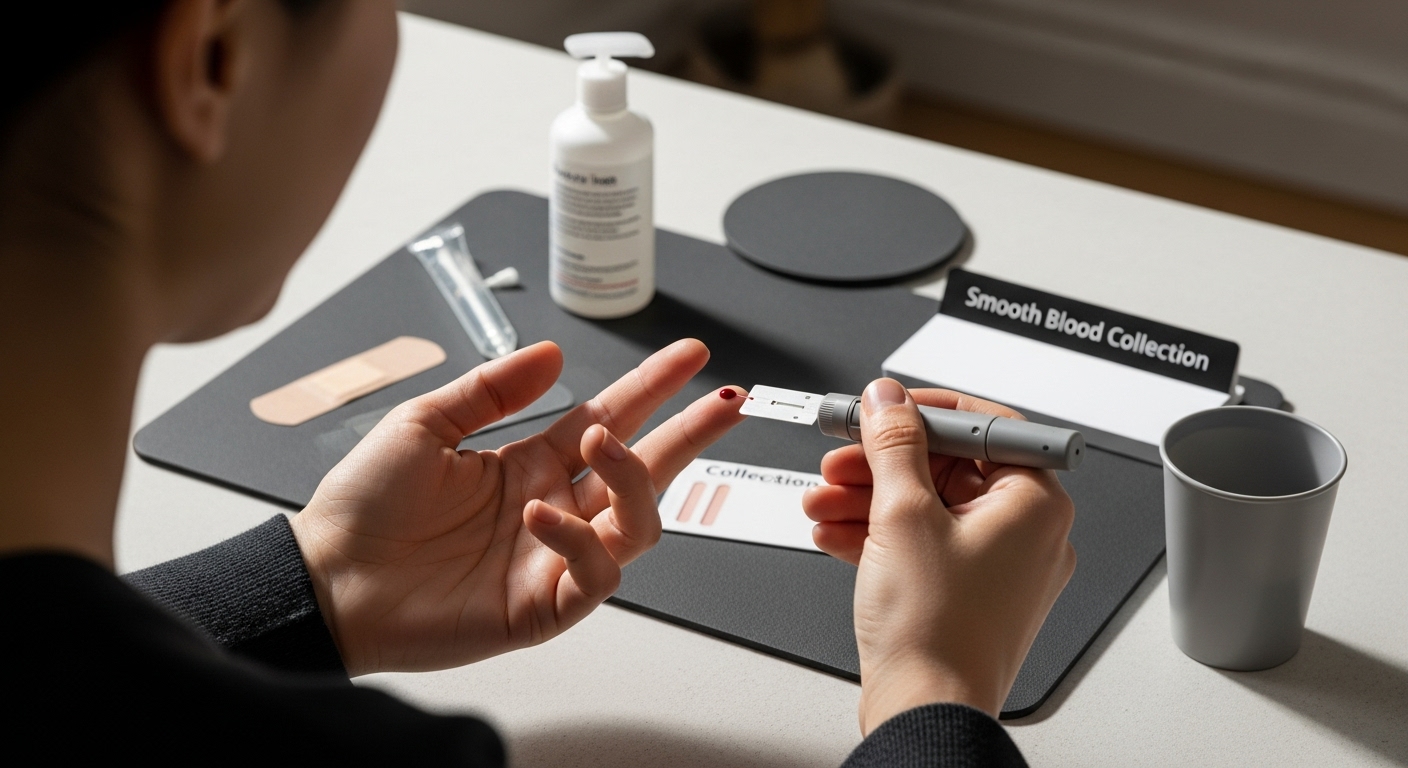
Step 3: Follow Proper Techniques for Blood Collection
Blood collection requires precision, patience, and a systematic approach to ensure accurate results. The quality of your sample directly impacts the reliability of your health insights. Begin by thoroughly washing your hands with warm water and soap for at least 20 seconds, then dry them completely with a clean towel. This initial step removes surface bacteria and improves blood circulation, making sample collection easier.
Select your preferred finger for blood collection, typically the ring finger or middle finger of your non-dominant hand. Warm the chosen finger by gently massaging it from the base towards the fingertip to stimulate blood flow. Clean the selected area with an alcohol swab, allowing it to air dry completely to prevent contamination and ensure a sterile sampling environment. Important: Do not touch the cleaned area before making the puncture.
Explore our comprehensive guide on women’s health blood testing to understand the nuanced aspects of blood sampling. Position the lancet perpendicular to your fingertip, ensuring the depth setting matches your skin thickness. Most professional lancets have adjustable depth settings to minimize discomfort while obtaining an adequate blood sample. Make a swift, confident puncture at the side of your fingertip where nerve endings are less concentrated, which helps reduce pain.
Once you’ve made the puncture, do not squeeze or massively compress the finger, as this can dilute the sample or introduce interstitial fluid. Instead, allow blood to form a naturally shaped droplet. Gently guide the blood onto your collection card or tube, ensuring you fill the designated area completely without overfilling. If blood flow stops before collecting sufficient sample, you may need to make a second, gentle squeeze near the base of the finger.
Your final blood collection verification checklist includes:
- Blood droplet collected without excessive squeezing
- Sample fills designated collection area
- No visible contamination on sample
- Finger puncture site clean and bandaged
Complete the process by applying a sterile adhesive bandage to the puncture site, monitoring for any unusual bleeding or discomfort.
Step 4: Label and Store Your Samples Correctly
Precise sample labeling and storage are critical steps that directly impact the accuracy and reliability of your blood test results. Proper documentation ensures your sample can be correctly identified and processed without any potential mix-ups or errors. Immediately after collecting your blood sample, you will need to create a comprehensive and clear identification system that meets professional medical standards.
Begin by preparing a clean, dry surface where you can safely label your collection tube or card. Use a permanent ink pen with waterproof capabilities to write your personal identification details. Critical information includes your full name, date of birth, collection date and time, and any unique identifier provided by your testing service. Write legibly and ensure the ink does not smudge or blur, which could compromise sample tracking.
Learn more about comprehensive health testing approaches to understand the importance of meticulous sample management. After labeling, carefully place your sample in the designated transportation container or protective sleeve. Avoid exposing the sample to direct sunlight, extreme temperatures, or significant physical movement that could potentially degrade the biological material.
Consider the time sensitivity of your sample. Most blood samples require processing within a specific timeframe to maintain their diagnostic integrity. If you cannot immediately send the sample, store it according to the specific instructions provided with your testing kit. Some samples might need refrigeration, while others can be kept at room temperature. Pay close attention to the recommended storage conditions to prevent sample degradation.
Your final sample preparation and storage verification checklist includes:
- Sample labeled with full personal identification
- Collection date and time clearly marked
- Unique identifiers accurately recorded
- Sample stored in recommended conditions
- Transportation container sealed and protected
By following these precise steps, you ensure that your blood sample remains pristine and ready for accurate laboratory analysis, maximizing the potential insights into your health.
This checklist table summarises the verification steps for proper sample labelling and storage, ensuring all key requirements are met for accurate laboratory analysis.
| Verification Requirement | Description |
|---|---|
| Correct personal identification | Full name, date of birth, unique identifier written clearly |
| Collection date and time marked | Date and time of blood sample collection legible and accurate |
| Sample stored appropriately | According to kit instructions (e.g. refrigeration or room temperature) |
| Container sealed and protected | Sample placed in protective, leak-proof transport packaging |
| Documentation checked | All paperwork complete and information matches sample label |
Step 5: Send Your Samples for Testing Safely
Sending your blood sample for testing requires careful attention to packaging, transportation, and timing to ensure the integrity of your diagnostic specimen. The journey from your home to the laboratory is a critical phase that can significantly impact the accuracy of your test results. Begin by reviewing the specific instructions provided with your testing kit, as different testing services may have unique requirements for sample submission.
Carefully inspect the packaging materials included in your kit. Most professional testing services provide specialized containers designed to maintain sample stability during transit. Ensure your labeled sample is securely placed within the primary container, which should be leak-proof and sealed tightly. Place this container inside the secondary packaging, typically a protective sleeve or sealed bag that provides an additional barrier against potential contamination or accidental spillage.
Explore our comprehensive guide to health testing options to understand the nuanced aspects of sample transportation. When preparing your sample for shipment, consider the time sensitivity of your specific test. Some samples require expedited shipping or must be sent on specific days to maintain their diagnostic value. Check the recommended transportation guidelines, which often specify whether refrigeration is necessary and the maximum time allowed between sample collection and laboratory processing.
Prepare the accompanying documentation with the same level of care you applied to collecting and labeling your sample. Double-check that all personal identification information matches precisely between your sample label and any accompanying forms. If a pre-paid return envelope or shipping label is provided, ensure it is correctly addressed and all barcodes or tracking information are clearly visible and undamaged.
Your final sample submission verification checklist includes:
- Sample securely sealed in primary container
- Secondary packaging intact and undamaged
- Shipping documentation complete and accurate
- Shipping method matches test kit instructions
- Sample sent within recommended time frame
By meticulously following these steps, you protect the integrity of your blood sample and maximize the potential for accurate, actionable health insights.
Bring Confidence and Accuracy to Your At-Home Blood Sampling
Struggling to get precise results from at-home blood testing can feel overwhelming. This guide has given you expert advice on quality equipment, clinical techniques, and the importance of proper labelling and secure sample handling—all to help you achieve more reliable and meaningful results from your own home. Yet, many still worry about sample accuracy, missed steps, and the risks of sending sensitive health data. This is where Lola Health provides real reassurance.
Our Our Blood Tests collection is carefully designed for people who want both convenience and clinical excellence. We provide everything you need, including UKAS-accredited laboratory analysis, simple online booking and instant access to doctor-reviewed results.
For those seeking in-depth understanding, our Full 360 - Pre-diabetes (HbA1) panel offers a window into over 45 biomarkers, empowering you to take control of your health. Feel confident with NHS-standard testing, whether you opt for self-sampling or a professional nurse visit arranged straight to your door.

Why wait to understand your health better? With Lola Health acting as your trusted partner, you can easily order your test online, experience rapid sample processing, and receive actionable insights fast.
Take the next step towards better wellbeing today—visit Lola Health for the most accurate and hassle-free blood testing experience available in the UK.Frequently Asked Questions
What equipment do I need for at-home blood sampling?
To successfully perform at-home blood sampling, you will need sterile lancets, alcohol swabs, gauze or cotton pads, adhesive bandages, disposable gloves, and a blood collection tube or card. Each of these items is essential for maintaining hygiene and ensuring accurate results.
How can I minimise discomfort during the blood sampling process?
Using professional-grade lancets with adjustable depth settings can help reduce discomfort. Selecting the correct depth for your skin thickness and making a swift puncture at the side of your fingertip, where nerve endings are less concentrated, will also minimise pain.
What should I do to prepare my workspace for blood sampling?
You should choose a flat, stable surface and clear it of any unnecessary items. Wipe down the area with a medical-grade disinfectant, ensuring it is free from contaminants. Arrange your equipment logically and consider using a disposable medical pad to create an additional barrier against contamination.
How should I label and store my blood samples?
After collecting your blood sample, label it with your full name, date of birth, collection date and time, and any specific identifiers. Store the sample according to the guidelines provided with your testing kit, considering refrigeration needs or room temperature storage to prevent degradation before submission.
Recommended
- What is At-Home Blood Testing? Understanding Its Impact – Lola Health
- How to Prepare for Phlebotomy: Step-by-Step Guide – Lola Health
- Women’s Health Blood Tests Guide: Navigate Your Health in 2025 – Lola Health
- Why Book a Clinic Blood Test? Understanding Its Importance – Lola Health
At-Home Blood Testing
Check your levels from home
Professional phlebotomist visit. Doctor-reviewed results in 2-5 days. Track your health with comprehensive blood panels.
→45-70 biomarkers tested · Venous blood draw · From £130