


At-home phlebotomy promises convenience and privacy for your blood tests. Think you only need a needle and some plasters? Not quite. There are more than a dozen specific tools and steps involved and even factors like workspace lighting and tube colour can affect the results. The biggest surprise is how following detailed preparation and consent processes can make your home blood collection as accurate and safe as a clinic visit.
Table of Contents
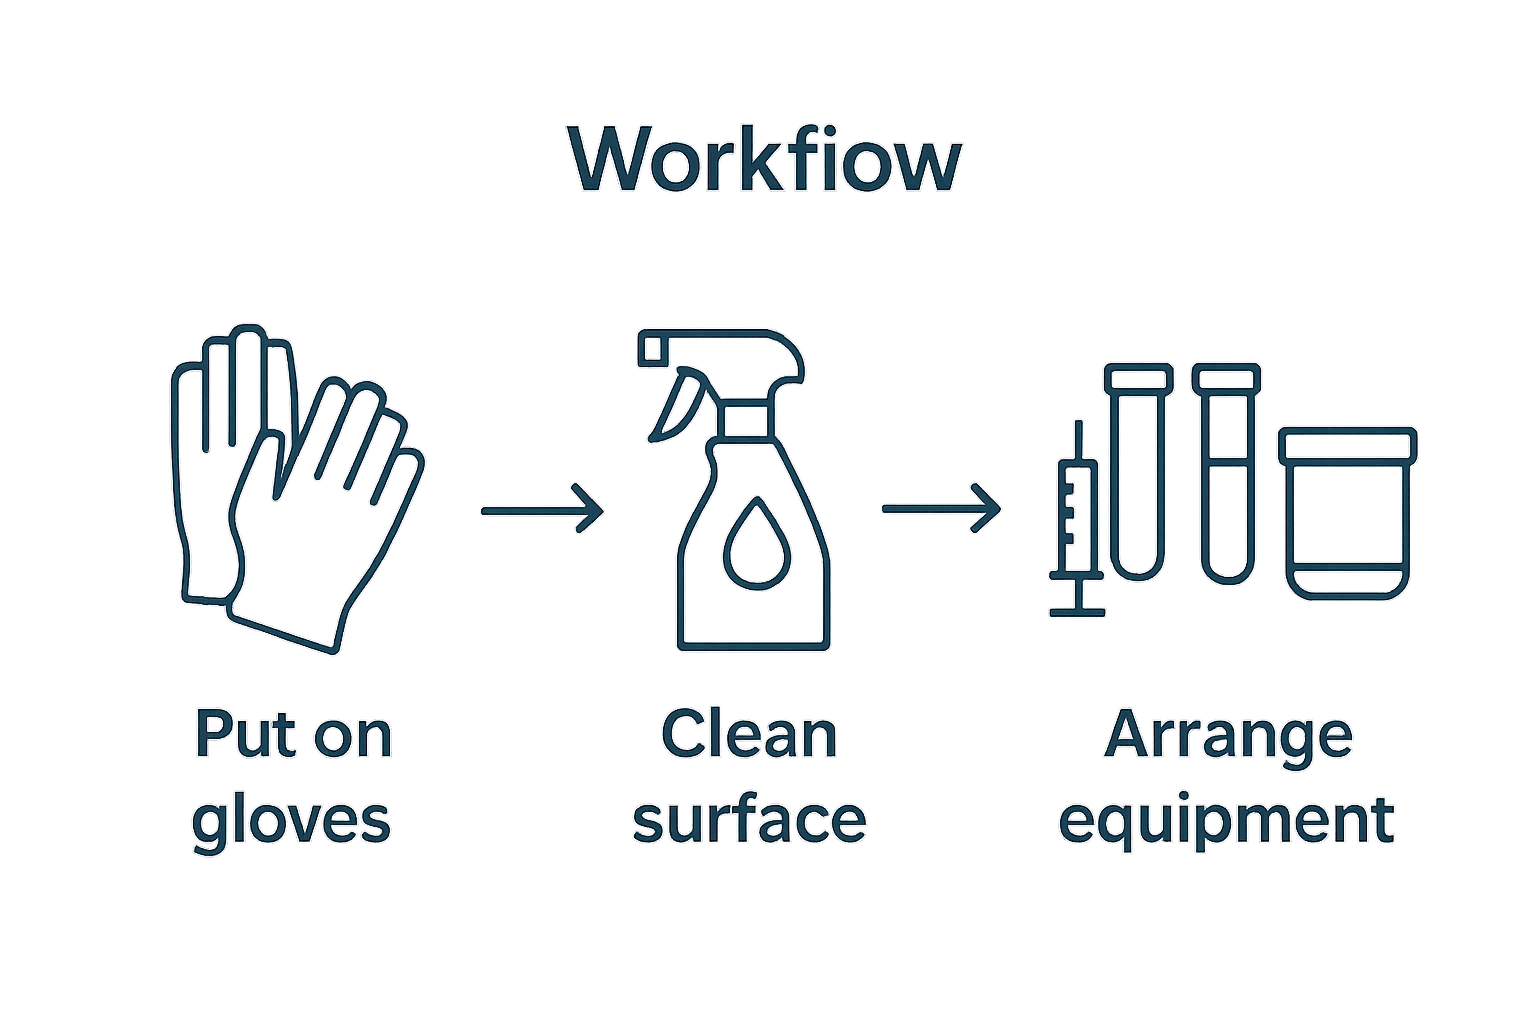
- Step 1: Gather Your Required Equipment And Supplies
- Step 2: Prepare Your Workspace For Safe Procedures
- Step 3: Verify Patient Information And Consent
- Step 4: Perform The Venipuncture Procedure With Care
- Step 5: Label And Store Samples Correctly
- Step 6: Ensure Proper Cleaning And Disposal Of Materials
Quick Summary
| Key Point | Explanation |
|---|---|
| 1. Assemble Quality Equipment | Use sterile, single-use tools to prevent contamination and ensure accurate sample collection during phlebotomy. |
| 2. Create a Sterile Workspace | Disinfect surfaces thoroughly and arrange tools efficiently to minimise contamination risks and improve operational flow. |
| 3. Verify Patient Identification and Consent | Collect two forms of ID and discuss the procedure to ensure informed consent and comfort for the patient. |
| 4. Follow Proper Venipuncture Technique | Maintain stringent hygiene and execute the needle insertion with precision to safeguard against complications during blood draws. |
| 5. Ensure Proper Sample Labelling and Storage | Label samples immediately with the correct patient information, and store them at the appropriate temperature to preserve test integrity. |
Step 1: Gather Your Required Equipment and Supplies
Successful at-home phlebotomy requires meticulous preparation and precise equipment selection. Before you begin your blood collection process, assembling the right tools will ensure a safe, efficient, and professional experience. Learn more about phlebotomy preparation to understand the comprehensive approach.
Your primary equipment collection should include several critical components. Sterile collection tools form the foundation of your phlebotomy kit. You will need disposable gloves, antiseptic wipes, tourniquet, multiple sizes of collection tubes, needles, adhesive bandages, and a sharps disposal container. Quality matters significantly here - medical-grade equipment prevents contamination and ensures accurate sample collection.
Precision is paramount when selecting your equipment. Opt for single-use, sterile needles specifically designed for venous blood draws. Your collection tubes should match the specific testing requirements, as different laboratory analyses demand distinct tube types with specific chemical preservatives. Colour-coded tubes help prevent errors: for instance, lavender tubes are typically used for haematology tests, while grey tubes are ideal for glucose measurements.
Ergonomic considerations can significantly impact your phlebotomy experience. Consider investing in a comfortable chair with arm support, good lighting, and a stable surface. A clean, well-organised workspace reduces potential mistakes and increases your confidence during the blood collection process. Having all materials within arm’s reach before starting prevents unnecessary movement and maintains a sterile environment.
Below is a table summarising the essential tools and supplies needed for at-home phlebotomy, their primary purposes, and any important notes to consider.
| Equipment/Supply | Primary Purpose | Important Notes |
|---|---|---|
| Sterile disposable gloves | Protect against contamination | Always use a fresh pair for each draw |
| Antiseptic wipes | Disinfect skin and surfaces | Allow area to air dry before proceeding |
| Tourniquet | Restrict blood flow to make veins more visible | Place 3-4 inches above puncture site |
| Collection tubes (variety) | Store and preserve blood samples | Match tube colour/type to test required |
| Needles (single-use) | Draw blood from the vein | Medical grade and sterile only |
| Adhesive bandages | Seal puncture site post-procedure | Apply after blood draw |
| Sharps disposal container | Safe disposal of needles and sharps | Keep within immediate reach |
| Biohazard transport bags | Secure, leak-proof storage for samples | Ensure properly sealed and labelled |
| Comfortable chair | Support patient and phlebotomist posture | Should have arm support |
| Adequate lighting | Improve vein visibility and accuracy | Preferably natural light or bright lamp |
| Stable work surface | Organise tools and perform procedure safely | Disinfect thoroughly before use |
Safety remains the paramount concern throughout this procedure. Always wear protective gloves and maintain a clean, organised workspace. Properly dispose of used materials immediately after collection, and store unused equipment in a sealed, clean container away from direct sunlight and moisture. By meticulously preparing your equipment and understanding each tool’s specific purpose, you set the stage for a successful at-home phlebotomy experience.
Verification checklist for equipment readiness:
- All tools are sterile and within expiration date
- Workspace is clean and well-lit
- Required tubes matched to specific test requirements
- Sharps disposal container is accessible
- Personal protective equipment is available
Step 2: Prepare Your Workspace for Safe Procedures
Creating a sterile, organised workspace is crucial for successful at-home phlebotomy. According to UK Government guidelines on clinical specimen handling, proper workspace preparation minimises contamination risks and ensures reliable sample collection.
Begin by selecting a clean, well-lit area with a sturdy, flat surface. Ideal locations include a dedicated table or desk with ample space for your equipment. Kitchen tables or home office desks work perfectly, provided they can be thoroughly sanitised before and after the procedure. Natural daylight or bright, even artificial lighting helps you identify veins more accurately and reduces potential errors during blood collection.
Thoroughly clean and disinfect your chosen workspace using medical-grade disinfectant wipes or a 70% isopropyl alcohol solution. Pay special attention to the surface area where you will place your equipment. Allow the surface to air dry completely to ensure maximum sterility. Remove any unnecessary items from the workspace to create a clutter-free environment that allows smooth, uninterrupted movement during the phlebotomy process.
Arrange your equipment strategically for optimal efficiency. Position your collection tubes, needles, gloves, antiseptic wipes, and sharps container within easy reach. Create a logical workflow that minimises unnecessary movement and reduces the risk of accidental contamination. Consider using a clean tray or dedicated medical workspace mat to further organise your materials and maintain a sterile field.
Ergonomics play a significant role in workspace preparation. Ensure you have a comfortable chair that allows you to maintain proper posture during the blood draw. Your chosen seat should provide adequate back support and allow your arm to rest comfortably on a stable surface. Proper positioning reduces hand tremors and increases precision during needle insertion.
Verification checklist for workspace readiness:
- Surface thoroughly cleaned and disinfected
- Adequate lighting available
- All equipment within easy reach
- Workspace clutter-free and organised
- Comfortable seating with proper support
- Sharps disposal container accessible
By meticulously preparing your workspace, you create a foundation for a safe, professional at-home phlebotomy experience that prioritises both accuracy and personal safety.
Step 3: Verify Patient Information and Consent
Verifying patient information and obtaining proper consent form the ethical cornerstone of any medical procedure, including at-home phlebotomy. According to UK Department of Health guidelines, informed consent is a critical legal and medical requirement that protects both the patient and the healthcare provider.
Patient identification is the first crucial step in this process. Request two forms of identification, with at least one being a government-issued document containing a photograph. Typically, a passport, driving licence, or national ID card works perfectly. Cross-reference these documents with the patient’s name, date of birth, and any additional demographic information provided during the initial booking process. This verification prevents potential errors and ensures you are collecting blood from the correct individual.
Consent involves more than simply obtaining a signature. Engage the patient in a detailed discussion about the blood draw procedure. Explain the purpose of the test, potential sensations they might experience, and any preparatory steps they need to follow. This conversation allows patients to ask questions, express concerns, and feel comfortable with the upcoming procedure. Some individuals might feel anxious about blood draws, so a calm, reassuring approach can significantly reduce their stress levels.
Documenting consent requires clear communication and written confirmation. Prepare a consent form that outlines the procedure, potential risks, and the patient’s rights. The form should be written in clear, straightforward language that avoids medical jargon. Ensure the patient understands each section before signing, and provide them with a copy for their personal records. If the patient is unable to provide consent due to age or medical condition, you may need to obtain consent from a legal guardian or designated healthcare proxy.
The following checklist table provides a quick reference for key verification steps to follow during the patient identification and consent process to ensure safety and professionalism.
| Checkpoint | Action Required | Outcome Ensured |
|---|---|---|
| Verify two forms of identification | Cross-check patient ID and booking details | Correct patient is identified |
| Explain consent form and procedure | Discuss steps, risks, and answer questions | Patient is informed and at ease |
| Obtain written consent | Secure patient signature and provide a copy | Legal and ethical compliance |
| Assess patient comfort and readiness | Observe patient understanding and reassurance | Patient is cooperative, not anxious |
Special considerations apply for vulnerable populations. For patients with communication difficulties, visual impairments, or limited language skills, consider using translation services, sign language interpreters, or simplified consent materials. Always prioritise the patient’s comprehension and comfort throughout the consent process.
Verification checklist for patient information and consent:
- Two forms of identification verified
- Consent form fully explained and understood
- Patient’s questions answered thoroughly
- Written consent obtained and documented
- Copy of consent provided to patient
- Patient appears comfortable and informed
By meticulously verifying patient information and obtaining genuine, informed consent, you establish a foundation of trust and professionalism in your at-home phlebotomy procedure.
Step 4: Perform the Venipuncture Procedure with Care
Venipuncture represents the most critical phase of your at-home blood collection process, requiring precision, technique, and calm concentration. Learn more about phlebotomy best practices to refine your understanding of this delicate procedure. According to Epsom and St Helier University Hospitals’ guidelines, successful venipuncture hinges on careful patient preparation and methodical execution.
Hand hygiene is your first critical step. Thoroughly wash your hands with soap and water for at least 20 seconds, then dry completely using a clean disposable towel. Put on sterile medical gloves, ensuring they fit snugly without restricting your movement. Inspect the patient’s arm, typically the inner elbow area, for suitable veins. Look for veins that appear prominent, straight, and away from potential nerve or artery locations.
Apply the tourniquet approximately 3-4 inches above the intended puncture site, ensuring it is tight enough to restrict venous blood flow but not so tight that it causes discomfort. Ask the patient to make a fist several times to help veins become more visible. Use your non-dominant hand to gently anchor and stabilise the skin, pulling it taut to create a firm surface for needle insertion. Select a vein that appears most suitable - typically the median cubital vein, which is usually large and easily accessible.
Before needle insertion, clean the selected area thoroughly with an antiseptic wipe, using a circular motion from the centre outwards. Allow the area to air dry completely to ensure maximum sterility. Hold the needle at a 15-30 degree angle, with the bevel facing upwards. Insert the needle swiftly and confidently in a smooth motion, avoiding hesitation which might cause additional patient discomfort. Once blood begins to flow into the collection tube, maintain a steady hand and minimize patient movement.
Monitor the patient throughout the procedure for any signs of distress or potential vasovagal response, such as pallor, sweating, or dizziness. If the patient appears uncomfortable, pause the procedure and provide reassurance. After collecting the required blood volume, remove the needle smoothly and immediately apply gentle pressure with a sterile gauze pad to prevent bruising.
Verification checklist for successful venipuncture:
- Proper hand hygiene completed
- Sterile gloves worn
- Appropriate vein selected
- Tourniquet applied correctly
- Antiseptic area cleaning performed
- Needle inserted smoothly
- Required blood volume collected
- Puncture site managed appropriately
Step 5: Label and Store Samples Correctly
Proper sample labelling and storage are critical to maintaining the integrity of your blood specimens and ensuring accurate diagnostic results. According to NHS guidelines on sample management, meticulous attention to detail can prevent potential errors that might compromise test outcomes.
Immediate labelling is crucial the moment blood is collected. Use a permanent marker to clearly write essential information directly on the collection tube. Include the patient’s full name, date of birth, collection date and time, and a unique identifier if provided by your healthcare service. Ensure your handwriting is legible and precise, avoiding any potential misinterpretation. Some collection kits might include pre-printed labels - if available, use these and double-check all information for accuracy.
Temperature management plays a vital role in sample preservation. Different tests require specific storage conditions, so understanding these requirements is essential. Most blood samples need refrigeration between 2-8 degrees Celsius to maintain cellular integrity. Avoid leaving samples at room temperature for extended periods, as this can cause cellular degradation and potentially invalidate test results. If immediate transportation to a laboratory is not possible, place the sealed, labelled tubes in a designated medical-grade container with appropriate temperature controls.
Organise your samples systematically to prevent mix-ups. Use a dedicated transport bag or container that separates individual samples and protects them from potential contamination. Consider using colour-coded tubes or additional tracking systems if multiple samples are being processed simultaneously. Always seal samples in biohazard bags, ensuring they are leak-proof and clearly marked with appropriate warning labels.
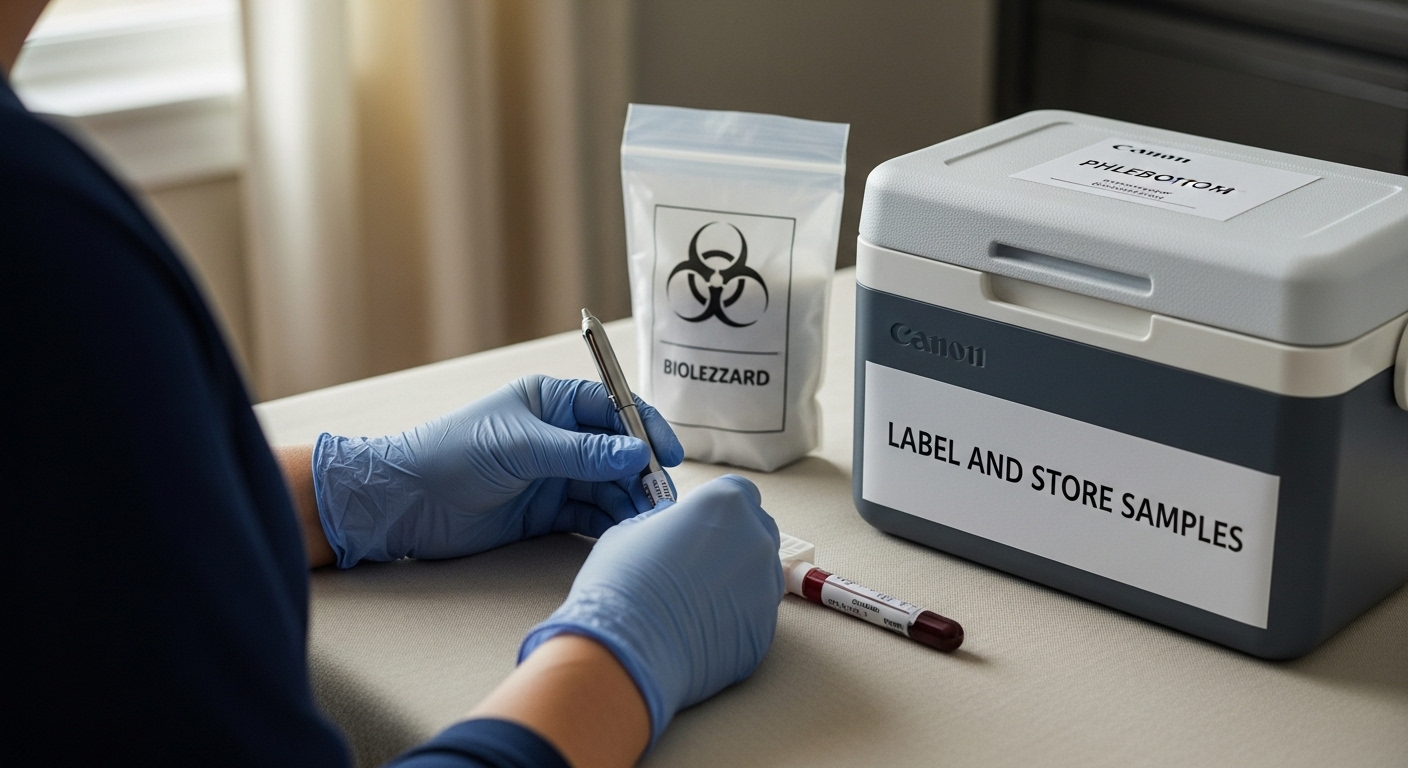
Special consideration must be given to time-sensitive samples. Some diagnostic tests require processing within specific timeframes, so coordinate with your healthcare provider about optimal collection and submission windows. Certain tests might need immediate refrigeration or even frozen storage, so confirm precise handling instructions before collection.
Verification checklist for sample management:
- All tubes labelled immediately after collection
- Full patient identification included
- Collection date and time recorded
- Appropriate storage temperature maintained
- Samples sealed in biohazard containers
- Transportation method confirmed with laboratory
- Tracking system implemented if multiple samples
Step 6: Ensure Proper Cleaning and Disposal of Materials
Properly managing medical waste is a critical responsibility that protects both personal and public health. UK government guidelines on healthcare waste emphasize the importance of systematic waste management to prevent potential infections and environmental contamination.
Sharps disposal requires immediate and careful attention. Your dedicated sharps container should be puncture-resistant, leak-proof, and clearly labelled with biohazard markings. Immediately after use, place needles and any sharp medical instruments directly into this container without recapping or manipulating the needle. Close the container securely after each use, ensuring no sharp edges protrude. When the container reaches approximately three-quarters full, seal it completely using the manufacturer’s prescribed method.
Disposable materials like gloves, gauze, and contaminated wipes require separate handling. Use designated medical waste bags - typically red or orange for infectious materials - to collect these items. Ensure the bag is sealed tightly after use, preventing any potential leakage or exposure. Double-bagging provides an additional layer of safety, particularly when dealing with materials that might have blood or bodily fluid contact.
Cleaning your workspace involves a systematic approach to disinfection. Use medical-grade disinfectant wipes or a 70% isopropyl alcohol solution to thoroughly clean all surfaces that came into contact with medical equipment or potential biological materials. Pay special attention to areas like your workspace surface, chair arms, and any equipment handles. Allow the disinfectant to air dry completely, which ensures maximum effectiveness in killing potential pathogens.
Proper hand hygiene is the final crucial step in your cleaning protocol. Wash your hands thoroughly with soap and water for at least 20 seconds, ensuring you clean all surfaces including between fingers and under fingernails. If soap and water are unavailable, use an alcohol-based hand sanitiser containing at least 60% alcohol. This step helps eliminate any potential microscopic contaminants that might have transferred during the procedure.
Verification checklist for cleaning and disposal:
- Sharps container sealed and stored safely
- Medical waste bags properly sealed
- All surfaces thoroughly disinfected
- Workspace returned to original condition
- Hands washed or sanitised completely
- All disposable materials removed from workspace
Ready to Take Control of Your Health at Home?

Mastering at-home phlebotomy requires careful planning, precise sample labelling, and proper waste disposal. But even with great skill and organisation, you might still worry about accuracy, sample storage, or accessing trusted results fast enough. If you want reliable health insights using the same professional standards covered in this guide, why not explore how Lola Health can help you go from home sample collection to full diagnostic insight?


Take the stress out of blood testing with our expertly delivered at-home nurse visits. Get comprehensive panels for key areas like Mental Health - Ferritin - Iron or Full 360 - Liver processed in UKAS-accredited labs with results from certified doctors. Visit Lola Health to book, order, and get your results in just days. Experience true convenience and confidence in your health journey today.
Frequently Asked Questions
What equipment do I need for at-home phlebotomy?
To successfully conduct at-home phlebotomy, you will need sterile collection tools such as disposable gloves, antiseptic wipes, a tourniquet, varying sizes of collection tubes, needles, adhesive bandages, and a sharps disposal container.
How should I prepare my workspace for a blood draw?
Select a clean, well-lit area with a sturdy, flat surface. Thoroughly clean and disinfect the workspace, arrange your equipment strategically, and ensure you have comfortable seating with proper support to minimise movement during the procedure.
What is the importance of patient consent in phlebotomy?
Verifying patient information and obtaining informed consent are essential to ensure the patient understands the procedure, feels comfortable, and acknowledges potential risks. This protects both the patient and the healthcare provider legally and ethically.
How should I label and store blood samples after collection?
Immediately label blood collection tubes with the patient’s full name, date of birth, collection date, and time. Maintain the appropriate storage temperature, typically between 2-8 degrees Celsius, and ensure samples are transported in leak-proof biohazard bags to prevent contamination.
Recommended
- How to Prepare for Phlebotomy: Step-by-Step Guide – Lola Health
- What is At-Home Blood Testing? Understanding Its Impact – Lola Health
- Women’s Health Blood Tests Guide: Navigate Your Health in 2025 – Lola Health
- Why Book a Clinic Blood Test? Understanding Its Importance – Lola Health
At-Home Blood Testing
Check your levels from home
Professional phlebotomist visit. Doctor-reviewed results in 2-5 days. Track your health with comprehensive blood panels.
→45-70 biomarkers tested · Venous blood draw · From £130